Tableau-Mapbox Integration
Today we’ll be learning to integrate Tableau and Mapbox. This feature is added to the Tableauu 9.2, it was not there in the earlier versions of Tableau. Mapbox is service provider of custom and beautiful online maps. We can build beautiful custom maps in Mapbox. I’ll be using superstore data for the tutorial. Workbook is attached to download.
Start with Mapbox
Go to Mapbox signup and create an account. Then go to your account then click on ‘API access tokens’ and there you’ll find ‘Your default token’. Copy your access token.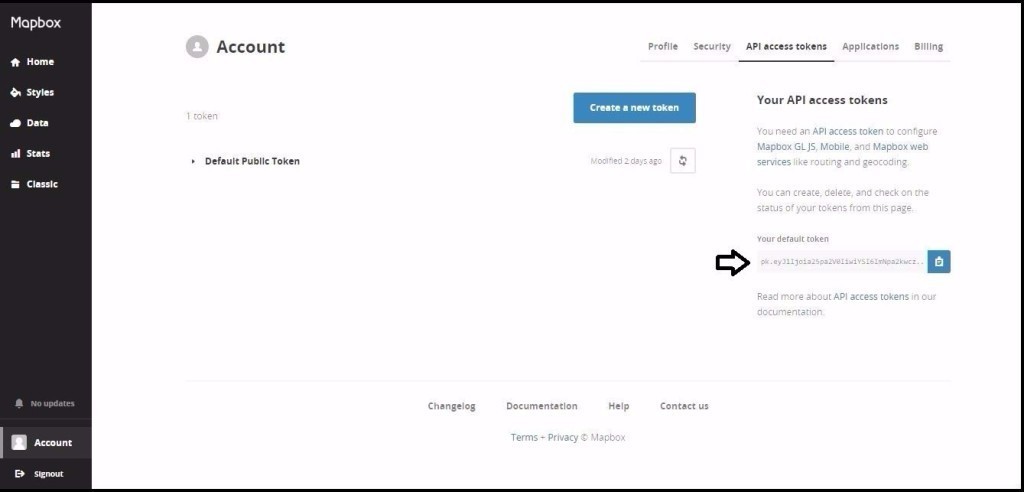
Importing the map to Tableau
Now open your Tableau workbook. Then go to Map > Background Maps > Map Services. A window will appear then click on Add > Mapbox Maps. Paste your API access token in the required field and give any name to your map and click OK. Check image below for reference.
Note– Make sure you’ve checked the Map you just created. I named it as Map as shown in image below.
Creating a Map viz in Tableau
Step 1. Place longitude in columns shelf and latitude in rows shelf.
Step 2. City in color and Order ID in size( make is measure as count).
Change Map style
To change the style of the map go to Map > Background Maps > Map Services. Then select the map you’ve created and click on edit. Select your style and click OK. I’ve used Dark style.
and that’s done about the Tableau-Mapbox integration. As a free user you’ll get few of the styles.
Check out the Mapbox Pricing Here!
image source: https://www.mapbox.com/pricing
Check out the Mapbox gallery for more maps and how to make custom maps.
Download workbook here!

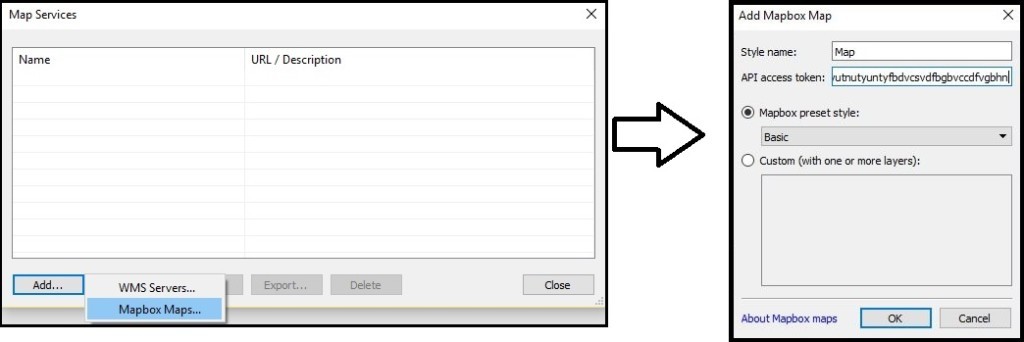
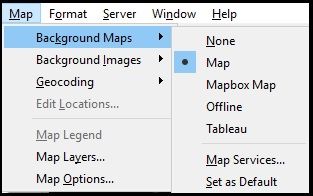
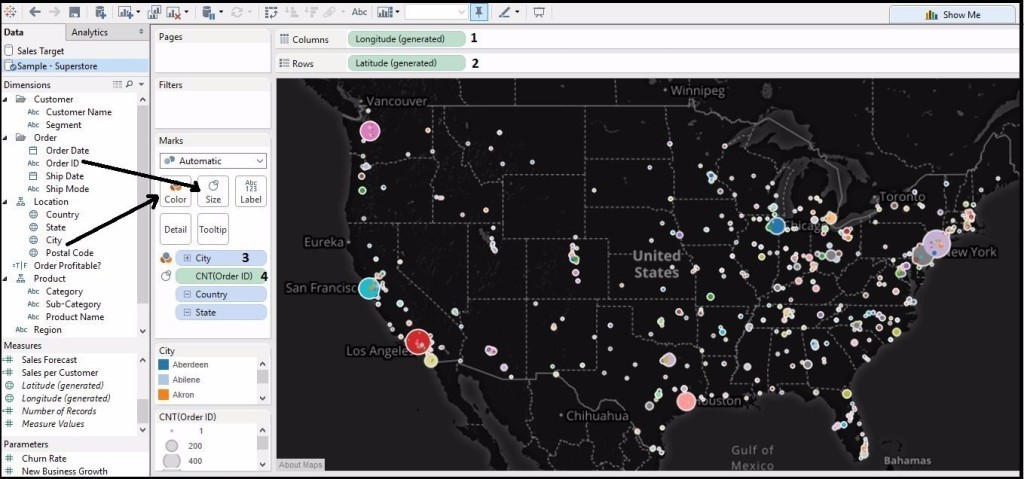
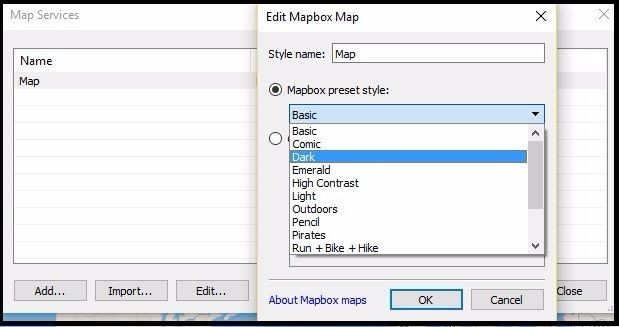
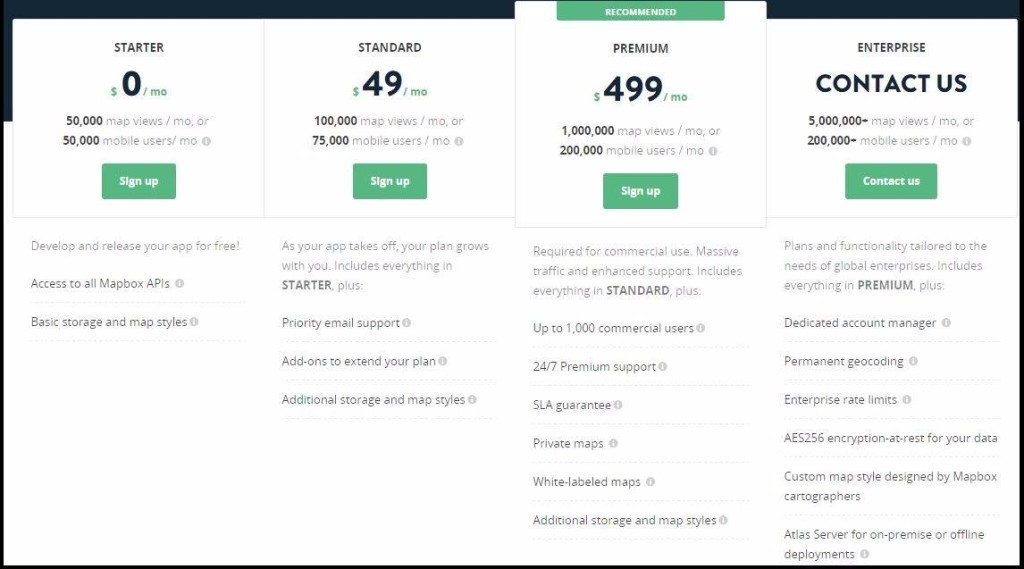
Tableau has a very active user and developer community where queries are answered quickly.